Category Archives: Networking

Networking

Clear Cisco Password

Reset password on Cisco Switch

We recently moved out of one of our hosting centers into a managed solution. As such, we no longer required a few of the switches/other network equipment/servers from this hosting center. Unfortunately I was working on the switches at the remote site and did not have my password sheet accessible, so I just reset the enable password so I could clear the configuration.

Power up the switch and press and hold the Mode button (on the physical switch)
My 2950 automatically went into “switch:” mode before I let go of the button, but the 3560 required me to release the mode button before successfully entering “switch:” mode.

flash_init
load_helper
dir flash:
rename flash:config.text flash:config.text.old
boot
N
enable
rename flash:config.text.old flash:config.text
copy flash:config.text system:running-config
configure terminal
enable secret password
exit
copy running-config startup-config
reload

After booting, enter enable mode
write erase
reload

Proxmox VLAN

Perhaps I’m just a little slow, but this one took me a while to figure out. I know there’s a lot of documentation floating around, but none of it seemed to work for my environment.
I was given a Dell PowerEdge 2950 server (2.5″ SAS backplane) with 8x 2.5″ 147GB 10KRPM SAS drives. It only had 16GB RAM so I upgraded to 32GB. Set the RAID to 10 (588GB raw) and away I went. I was also given a Cisco 2950 switch to play around with.

First I installed vmware esxi 4.1 (I know 5.0 is already out, but I already had an older server running esxi41 and wanted to keep them roughly the same). I then realized the free hypervisor didn’t include many features I was used to (Live migrations is huge in my book). For shame.

It was then that a fellow worker wanted to install Server 2008 R2 with hyper-v. For shame.

I like free, and I like a lot of the features of KVM, so I went with Proxmox 1.9.

I plugged eth0 into port 21 (vlan 40) for management
I plugged eth1 into port 5 (trunk) for trunking

Here’s my proxmox networking config (/etc/network/interfaces)
* as this didn’t like my tabbing, here’s a link to the txt file*

# LOCALHOST
auto lo
iface lo inet loopback

# INTERFACES
iface eth0 inet manual
iface eth1 inet manual

# PRIMARY BOND
auto bond0
iface bond0 inet manual
slaves eth0 eth1
bond_miimon 100
bond_mode 4

# SECONDARY BONDS
auto bond0.40
iface bond0.40 inet manual
vlan-raw-device bond0

auto bond0.10
iface bond0.10 inet manual
vlan-raw-device bond0

auto bond0.20
iface bond0.20 inet manual
vlan-raw-device bond0

auto bond0.30
iface bond0.30 inet manual
vlan-raw-device bond0

# BRIDGES
auto vmbr0
iface vmbr0 inet static
address 10.4.0.216
netmask 255.255.255.0
gateway 10.4.0.5
bridge_ports bond0.40
bridge_stp off
bridge_fd 0

auto vmbr1
iface vmbr1 inet manual
bridge_ports bond0.10
bridge_stp off
bridge_fd 0

auto vmbr2
iface vmbr2 inet manual
bridge_ports bond0.20
bridge_stp off
bridge_fd 0

auto vmbr3
iface vmbr3 inet manual
bridge_ports bond0.30
bridge_stp off
bridge_fd 0

And here’s my Cisco switch configuration (just for the ports used obviously):

interface FastEthernet0/5
description proxmox VM
switchport trunk allowed vlan 10,20,30,40
switchport mode trunk
spanning-tree portfast

interface FastEthernet0/21
description proxmox Management
switchport access vlan 40
spanning-tree portfast

Next I’ll be testing some iscsi server connectivity.

Well I went ahead and ran some initial tests:
POC server:
2.7GHz AMD x64, 4GB RAM, 160GB SATA 7200, 10/100/1000

CPU BOGOMIPS: 10772.71
REGEX/SECOND: 418377
HD SIZE: 36.67 GB (/dev/mapper/pve-root)
BUFFERED READS: 98.46 MB/sec
AVERAGE SEEK TIME: 11.16 ms
FSYNCS/SECOND: 573.28

Dell 2950 Production:
Dual 3.16GHz Xeon (X5460), 32GB RAM, 8X 147GB SAS 10000, Dual 10/100/1000

CPU BOGOMIPS: 50539.82
REGEX/SECOND: 1036781
HD SIZE: 94.49 GB (/dev/mapper/pve-root)
BUFFERED READS: 282.70 MB/sec
AVERAGE SEEK TIME: 5.22 ms
FSYNCS/SECOND: 1998.46

Still setting up the test iSCSI

Smooth-Sec

I’m a huge fan of free software. I’m not against compiling code, installing dependencies, or taking days to research fixes to my issues. So when I read about Phillip Bailey’s turnkey solutions, it makes me wonder how it’ll all work. Well, I’m here to say it DOES WORK WELL! Link to Bailey.

PBailey has released some snort-based turnkey solutions in the past (Snorby SPSA), but I really like the new solution SMooth-Sec.

After installing the software on an older HP DL320 G3 (P4 3.4 with 2GB RAM and dual 80GB SATA) I mirror one port on eth0 to the primary on the core switch

Switch#conf t
Switch(config)#monitor session 1 source interface Fa0/18
Switch(config)#monitor session 1 destination interface Fa0/2
Switch(config)#

Eth1 is then setup with a static IP on the management side (for access).
After letting this sit for about 30 minutes – the updates are run every half hour – I find that the number of results per hour are in the hundreds of thousands. Ut oh, it’s killing the server with load averages over 9.00

Edit out your external net

nano /etc/suricata/suricata.yaml
Find “EXTERNAL_NET” and change from $ANY to !$HOME_NET
Find “threshold-file” and uncomment this line
Save and quit

Now I also have a couple nagios monitoring servers around the network that are constantly sending traffic. So I needed to add these servers to the exemption list for suricata.
nano /etc/suricata/threshold.config

suppress gen_id 1, track by_src, ip 192.168.0.253
suppress gen_id 1, sig_id 366, track by_src, ip 192.168.0.252

It’s recommended to reboot the server after making changes.

Rancid Ubuntu 10.04

Rancid stands for Really Awesome New Cisco confIg Differ. It’s produced by Shrubbery Networks (http://www.shrubbery.net/rancid/). Basically it’s sole purpose is to make backups of your networking gear. And it can email you of any changes as well. This documentation is a work in progress – I had attempted to setup a rancid server one other time, but ran out of courage shortly after the beginning. And I’m compiling based on a few other internet sources.

Started with a 10.04.3 LTS server with LAMP/Mail(postfix) installed. x86 for those who care. For those who don’t care, it’s still on an x86 system.

I started installation, like all of my other projects, by switching to root:

su

I also created the rancid user with a password:

adduser rancid

Install the Rancid Base:

apt-get install rancid
y

Edit the Rancid Configuration by adding groups:

nano /etc/rancid/rancid.conf
LIST_OF_GROUPS="Group1 Group2 ... Group18"
Save and Quit

Edit the Mail Aliases:

nano /etc/aliases
rancid-Group1: root
rancid-admin-Group1: root
rancid-Group18: root
rancid-admin-Group18: root
Save and Quit

Restart Your Mail Services:

/etc/init.d/postfix restart

Run rancid CVS Groups:

sudo su -c /var/lib/rancid/bin/rancid-cvs -s /bin/bash -l rancid
You should now see a few new directories created in /var/lib/rancid:
/Group1
/Group2

/Group18

We want to edit the configuration files in each of these groups to reflect the devices. We’ll start with /Group1:

cd /var/lib/rancid/Group1
nano router.db
IPADDRESS_OR_HOSTNAME:brand:up_or_down
If you select down, rancid will not actively check this device.
Example:
10.10.0.1:cisco:up
10.15.0.1:cisco:up
10.20.0.20:cisco:up

At one time, whilst setting this up for the first time, I thought that you could only have one login/enable for the entire system. I found that quite “uncool”. Luckily for everyone reading this, I found out that I was incorrect with my assumption. It’s actually quite easy now that I look back on the configuration.

Create A Password File:

The installation of rancid on ubuntu will attempt to create a user called “rancid” with a home directory of /var/lib/rancid, but a login point of /dev/null. But, since we already created the “rancid” user, we must create a cloginrc file to house the passwords for your cisco gear in this user’s home directory. If you run this as root, it’ll be in /root/.clogin.rc
nano /home/rancid/.cloginrc
add method * telnet
add password IPADDRESS_OR_HOSTNAME LOGINPASSWORD ENABLEPASSWORD
add password OTHERIP_OR_HOSTNAME LOGINPASSWORD ENABLEPASSWORD
Save and exit

For SSH:

add autoenable * 1
add method IPADDRESS ssh
add user IPADDRESS USERNAME
add userpassword IPADDRESS PASSWORD
add password IPADDRESS PASSWORD ENABLEPASSWORD

Change permissions of the password file (isn't necessary now that I created the user to begin with):

chmod 640 /var/lib/rancid/.cloginrc
chown rancid /home/rancid/cloginrc

Run the rancid server:

sudo su -c /var/lib/rancid/bin/rancid-run -s /bin/bash -l rancid

View the Log Files:

nano /var/log/rancid/GROUPNAME.DATE.TIME
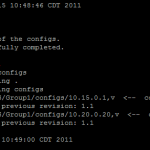
Where Are The Configuration Files?

/var/lib/rancid/CVS/GROUPNAME/configs/IP_OR_HOSTNAME,v

Too Much Information:

If you feel like you only want to have the configuration files and not the proc info/mem info etc, just edit the following file:
nano /var/lib/rancid/bin/rancid
Search for "# Mail"
Comment out lines you no longer wish to document
Save and Quit

Add the Web GUI:

apt-get install cvsweb
nano /etc/cvsweb/cvsweb.conf
Find "@CVSrepositories"
Add:
'rancid' => ['Rancid', '/var/lib/rancid/CVS'],
Save and Quit
Restart apache
apache2ctl restart
sudo ~rancid/bin/rancid-run (or, if in as root, rancid-run)
You can now open a web browser to http://IPOFSERVER/cgi-bin/cvsweb

EMail testing
I am having a few issues with email aliases - you're supposed to be able to utilize "rancid-NAMEOFDEVICE: real email" or the like for it to forward. I was getting NDRs as it was trying to send locally. So I temporarily changed the NDR to all send to the email address I wanted to send anyway.

Cron job
I cron this for every 10 minutes - but it takes longer and longer to check all the devices on the network when I keep adding more and more to the configuration.

Sample Configuration (/home/rancid/.cloginrc):

add method 10.15.1.245 telnet
add method 10.15.1.246 telnet
add method 10.11.0.2 ssh
add user 10.11.0.2 rancid
add userpassword 10.5.0.2 P@SSw0rd
add password 10.15.1.246 P@55 3n@bL3
add password 10.15.1.245 P@55 3n@bL3
add password 10.11.0.2 P@SSw0rd 3n@bL3

***EDIT***
Sometimes I'm a little slow when it comes to problems with workarounds - I mean, why fix something when it's only halfway broken?
I forgot that when you edit the /etc/aliases file that you have to run the command newaliases to update the /etc/aliases.db file. Otherwise you'll see "warning: database /etc/aliases.db is older than source file /etc/aliases" in your /var/log/mail.info file. And away we go!

***EDIT 2***
If you put in hostnames instead of IP addresses (preferred method as it makes it easier to find in the list later), it's recommended to add static address aliases instead of relying on DNS.
nano /etc/hosts
IPADDRESSOFDEVICE NAMEOFDEVICE NAMEOFDEVICE.DOMAIN.TLD
Ping the name of the device and verify you have resolution.

Also, I found that rancid HATES capital letters. Recommended that everything be lowercase. ESPECIALLY in your .clogin file!!! I found this out with tail -45 /var/log/rancid/LATESTFILEHERE

And, if you follow my above installation procedure, you will find the main page loads without any icons. I sorted this out by the following:
mkdir /var/www/icons
nano /etc/apache/sites-enabled/000-default
Find Alias /doc/ "/usr/share/doc/"
Add the following below it
Alias /cvsweb/icons/ "/var/www/icons/"
Save and quit
apache2ctl restart
Load the dir.gif, back.gif, and text.gif files of your choosing into the /var/www/icons directory

***EDIT 3***
I set this to cron every hour and email changes - it kept emailing the same router.db retrieving version 1.21 over and over - every hour.
I checked the logs (/var/lib/rancid/logs/NEWESTDATE) and found:

cvs commit: Up-to-date check failed for `configs/IPADDRESS'

Just go to
cd /var/lib/rancid/NAMEOFGROUP/configs
and run
cvs update
Rerun rancid and verify
rancid-run

Install SSL Certificate on Cisco ASA 5510 SSL VPN

It’s never good practice to have your users get used to seeing “Certificate Invalid” errors on secure sites. I know a lot of IT departments that train their users to just click past the errors. What happens when you enable a Man in the Middle attack? Cain and Abel anyone?

So after we had our load balanced ASA5510’s setup, we purchased some licenses for SSLVPN Users. Unfortunately that means the site must be secured AND have a certificate. The self-signed cert is only good for testing. Production requires an authenticated certificate from a globally trusted CA. For our internal-facing sites we utilize GoDaddy (cheap certs).

Create the CSR:
ASDM for Cisco login
Configuration, then Certificate Management, followed by Identity Certificates
Click Add
Click the radio button Add a new identity certificate
Click New… for a new key pair – I generally name it godaddy12 (vendor+year) and make it 2048 bit
In the Certificate Subject DN, Add the CN (vpn.domain.tld MUST BE FQDN), the OU, the O, the C, the St, and the L as appropriate
Click on the advanced button and make sure the FQDN is the same as the CN you entered before (vpn.domain.tld)
Now click on Add Certificate
Browse to where you want to save your CSR – I save it as ASA5510_12.csr.txt

Godaddy Cert
Purchase the cert and download the certificate using the “other” category. That way you get the CA cert (and intermediary) along with your identity certificate.
Log into your ADSM
Select Configuration
Select Device Management
Expand Certificate Management
Select CA Certificates
Click Add, select the gd_bundle.crt
Then select Identity Certificates
Click on your CSR Request and click the Install button
Select your SITENAME.crt

Now we need to apply these certificates to the SSL Site!
Under Configuration, Device Management still
Expand Advanced
Select SSL Settings
Click on the interface where your SSLVPN terminates (in my case it was outside)
Edit this interface
Select the Primary Enrolled Certificate and Load Balancing Enrolled Certificate (if applicable)
Apply the settings

Test your https://vpnsite
If everything tests OK, save the configuration

Asus O!Play HDP-R1

I purchased an OPlay about a year ago. It’s been great – uses less power than my former HTPC AND the wife likes the ability to navigate via remote only better than my keyboard/mouse/remote combo from before. She (and I) misses the XBMC interface though. That interface is MUCH better than the ASUS one. But who can complain about 14 watts of power and the size of the unit?

So why the post? I was having problems playing Bluray ISO rips. DVD ISO’s played just fine. Bluray m2ts files played just fine. Bluray ISOs would skip quite a bit in terms of the video – audio was always working via the HDMI connection. The odd part was the same files would play just fine over the external USB powered Hard Drive without skipping.

Hardware:
2.5GHz Pentium Dual-Core
1024MB DDR2 PC6400
4X 1.5TB 5400RPM SATA in RAID5 (about 4.2TB usable)
FreeNAS 0.7.1
Gigabit Layer 3 switch

I had set the freenas settings as follows:
Send/Receive buffers were set to 65535
Large read/write was set to on
MTU was set to 9216 (jumbo frames)

Still it was skipping. Since it didn’t happen on the external drive, I assumed that the network was to blame. After a little bit of research I found out that Samba is not nearly as awesome as NFS.

So, turn on NFS on your freenas:

Path of /mnt/raid/Multimedia with Network of 192.168.1.0/24 in my case

Then, telnet to your OPlay and make a few minor settings:

Open Putty
Telnet to the OPlay
Login as “root”
mkdir -p /tmp/ramfs/volumes/core
mount -t nfs -o intr,nfsvers=3,rsize=32768,wsize=32768,hard,udp,nolock 192.168.1.234:/mnt/raid/Multimedia /tmp/ramfs/volumes/core

If you get an error, you did something wrong. Obviously change the IP:/directories to be that of your environment.

If it works, move onto making this a startup script.

cp /usr/local/etc/rcS rcS.old
vi /usr/local/etc/rcS
Scroll down to the end of the file, then press “i”
#Mount NFS
mkdir -p /tmp/ramfs/volumes/core
sleep 15
mount -t nfs -o intr,nfsvers=3,rsize=32768,wsize=32768,hard,udp,nolock 192.168.1.234:/mnt/raid/Multimedia /tmp/ramfs/volumes/core
Press “esc”
Type “:wq” and then hit enter

You should now see your NFS share on your OPlay’s local disk area! Yay!
AND no more skipping issues! YESSSS

I’m running firmware 1.28 NTSC.