Server 2003 BSOD processor.sys

There was a server that converted from a physical machine to a virtual one on a Virtual Server 2005 box. I was tasked with moving this server from 2005 to proxmox.

Transfer success! BSOD after reboot. Turns out there’s a registry key that’s a little funky:
http://blogs.msdn.com/b/virtual_pc_guy/archive/2005/10/24/484461.aspx

basically hklm\system\current control\services\processor
change the start value to ‘4’ – mine was at 3. no more bsod.

Clear Cisco Password

Reset password on Cisco Switch

We recently moved out of one of our hosting centers into a managed solution. As such, we no longer required a few of the switches/other network equipment/servers from this hosting center. Unfortunately I was working on the switches at the remote site and did not have my password sheet accessible, so I just reset the enable password so I could clear the configuration.

Power up the switch and press and hold the Mode button (on the physical switch)
My 2950 automatically went into “switch:” mode before I let go of the button, but the 3560 required me to release the mode button before successfully entering “switch:” mode.

flash_init
load_helper
dir flash:
rename flash:config.text flash:config.text.old
boot
N
enable
rename flash:config.text.old flash:config.text
copy flash:config.text system:running-config
configure terminal
enable secret password
exit
copy running-config startup-config
reload

After booting, enter enable mode
write erase
reload

Proxmox VLAN

Perhaps I’m just a little slow, but this one took me a while to figure out. I know there’s a lot of documentation floating around, but none of it seemed to work for my environment.
I was given a Dell PowerEdge 2950 server (2.5″ SAS backplane) with 8x 2.5″ 147GB 10KRPM SAS drives. It only had 16GB RAM so I upgraded to 32GB. Set the RAID to 10 (588GB raw) and away I went. I was also given a Cisco 2950 switch to play around with.

First I installed vmware esxi 4.1 (I know 5.0 is already out, but I already had an older server running esxi41 and wanted to keep them roughly the same). I then realized the free hypervisor didn’t include many features I was used to (Live migrations is huge in my book). For shame.

It was then that a fellow worker wanted to install Server 2008 R2 with hyper-v. For shame.

I like free, and I like a lot of the features of KVM, so I went with Proxmox 1.9.

I plugged eth0 into port 21 (vlan 40) for management
I plugged eth1 into port 5 (trunk) for trunking

Here’s my proxmox networking config (/etc/network/interfaces)
* as this didn’t like my tabbing, here’s a link to the txt file*

# LOCALHOST
auto lo
iface lo inet loopback

# INTERFACES
iface eth0 inet manual
iface eth1 inet manual

# PRIMARY BOND
auto bond0
iface bond0 inet manual
slaves eth0 eth1
bond_miimon 100
bond_mode 4

# SECONDARY BONDS
auto bond0.40
iface bond0.40 inet manual
vlan-raw-device bond0

auto bond0.10
iface bond0.10 inet manual
vlan-raw-device bond0

auto bond0.20
iface bond0.20 inet manual
vlan-raw-device bond0

auto bond0.30
iface bond0.30 inet manual
vlan-raw-device bond0

# BRIDGES
auto vmbr0
iface vmbr0 inet static
address 10.4.0.216
netmask 255.255.255.0
gateway 10.4.0.5
bridge_ports bond0.40
bridge_stp off
bridge_fd 0

auto vmbr1
iface vmbr1 inet manual
bridge_ports bond0.10
bridge_stp off
bridge_fd 0

auto vmbr2
iface vmbr2 inet manual
bridge_ports bond0.20
bridge_stp off
bridge_fd 0

auto vmbr3
iface vmbr3 inet manual
bridge_ports bond0.30
bridge_stp off
bridge_fd 0

And here’s my Cisco switch configuration (just for the ports used obviously):

interface FastEthernet0/5
description proxmox VM
switchport trunk allowed vlan 10,20,30,40
switchport mode trunk
spanning-tree portfast

interface FastEthernet0/21
description proxmox Management
switchport access vlan 40
spanning-tree portfast

Next I’ll be testing some iscsi server connectivity.

Well I went ahead and ran some initial tests:
POC server:
2.7GHz AMD x64, 4GB RAM, 160GB SATA 7200, 10/100/1000

CPU BOGOMIPS: 10772.71
REGEX/SECOND: 418377
HD SIZE: 36.67 GB (/dev/mapper/pve-root)
BUFFERED READS: 98.46 MB/sec
AVERAGE SEEK TIME: 11.16 ms
FSYNCS/SECOND: 573.28

Dell 2950 Production:
Dual 3.16GHz Xeon (X5460), 32GB RAM, 8X 147GB SAS 10000, Dual 10/100/1000

CPU BOGOMIPS: 50539.82
REGEX/SECOND: 1036781
HD SIZE: 94.49 GB (/dev/mapper/pve-root)
BUFFERED READS: 282.70 MB/sec
AVERAGE SEEK TIME: 5.22 ms
FSYNCS/SECOND: 1998.46

Still setting up the test iSCSI

Owncloud Ubuntu

I was recently tasked again to come up with a better solution than using dropbox. iFolder is great when it was working, at least from an IT perspective. The end users thought it was a little bit bulky and wanted something a little easier to use and understand. That’s when I saw owncloud – It had all the features of webdav without many of the headaches.

Owncloud is opensource – they even have packages for Ubuntu! I was excited.

apt-get install mp3info curl libcurl3 libcurl3-dev php5-curl zip build-essential
wget http://owncloud.org/releases/owncloud-1.2.tar.bz2
tar xvjf owncloud-1.2.tar.bz2
mv owncloud /var/www/
chown -R www-data:www-data owncloud/
**EDIT2** it’s now up to final 2.0 http://owncloud.org/releases/owncloud-2.tar.bz2

Browser to http://serveripaddress/owncloud
There is no LDAP setup quite yet. Maybe next revision?

Since I wanted to connect a windows machine to this server as a test, I setup a user and then attempted to connect to the webdav.
Unfortunately we require another piece of software to be installed to support owncloud:
http://www.netdrive.net/
NetDrive is free for personal use. Webdrive, a variant of NetDrive, is not free. If this gets approved by the PTB, then we’ll end up buying maybe 25 licenses (for developers).

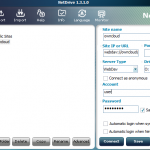
After the install of netdrive and a reboot, you can connect to your owncloud server!
You may have noticed on the http://serveripaddress/owncloud site when you logged in as the administrator, you can see at the very bottom of the page:
“Hint: Mount it via webdav like this: webdav://address/to/your/webdav/here/owncloud.php”
You will need that entire address to connect using NetDrive.

After connection you will see your webdav drive as a shared drive on My Computer.

***EDIT***
Turns out that you don’t require this software. You can just edit a registry key and add it to you windows 7 machine without issues:
Start the WebClient service
Add the following key in regedit
HKLM\SYSTEM\CurrentControlSet\services\WebClient\Parameters
“BasicAuthLevel” set to “2”

Since this is an external/internal facing server, I had to secure it up a bit.
Firewall rule only allowing ports 80, and 443. SSH can be accessed internally only.

I edited the hosts file to deny all, and only allow certain ranges for my networks:
Hosts.deny

sshd:all

Hosts.allow

sshd:internaliprange/24 publicip anotherip

nano /etc/fail2ban/filter.d/apache-owncloud.conf

# Fail2Ban configuration file
# Author: TheLibrarie.com
# $Revision: 001 $
#

[Definition]

failregex = -.* 401 499
OR
failregex = -.*POST.*/index\.php
ignoreregex =

Test with the regex
fail2ban-regex /var/log/apache2/access.log /etc/fail2ban/filter.d/apache-owncloud.conf

As that worked, I put the following in my /etc/fail2ban/jail.local

[owncloud]
enabled = true
port = http,https
filter = apache-owncloud
logpath = /var/log/apache/access.log
maxretry = 5

/etc/init.d/fail2ban restart

I also noticed that someone could simply navigate to http://servername/owncloud/data and see all the usernames and then drill down into all of the files. Obviously a huge issue.
I edited /etc/apache2/sites-available/default to disallow directory listing for the entire site:
nano /etc/apache2/sites-available/default
Under “Directory /var/www/>” Change the following line from:
Options Indexes FollowSymLinks MultiViews
To
Options -Indexes IncludesNOEXEC FollowSymLinks MultiViews
apache2ctl restart

Final Thoughts:
After I run through some more testing on my end, I will unleash it to the QA department to hit the crap out of it. If it still passes testing, I’ll implement SSL. And then test again. Then release to the masses.

**EDIT3**
I’ve installed the 2b1 beta – there is LDAP, but I haven’t configured just yet. I had to write this down before I forget:
Change PHP to allow larger than 2MB file uploads

nano /etc/php5/apache2/php.ini
Search for “2m”
Change to 10m
Save, quit, restart apache

**EDIT4**
IE9 has some issues with compatibility mode for this software. I had to add this to the html meta portion (:
meta http-equiv="X-UA-Compatible" content="IE=9" /

**EDIT5**
I was having problems with downloading certain docx files – the server was thinking these were actually compressed archives. I had to edit the mimetypes.fixlist.php file with the following:
nano /owncloud/lib/mimetypes.fixlist.php
'docx'=>'application/msword',
ETC – add any other applications you require

Smooth-Sec

I’m a huge fan of free software. I’m not against compiling code, installing dependencies, or taking days to research fixes to my issues. So when I read about Phillip Bailey’s turnkey solutions, it makes me wonder how it’ll all work. Well, I’m here to say it DOES WORK WELL! Link to Bailey.

PBailey has released some snort-based turnkey solutions in the past (Snorby SPSA), but I really like the new solution SMooth-Sec.

After installing the software on an older HP DL320 G3 (P4 3.4 with 2GB RAM and dual 80GB SATA) I mirror one port on eth0 to the primary on the core switch

Switch#conf t
Switch(config)#monitor session 1 source interface Fa0/18
Switch(config)#monitor session 1 destination interface Fa0/2
Switch(config)#

Eth1 is then setup with a static IP on the management side (for access).
After letting this sit for about 30 minutes – the updates are run every half hour – I find that the number of results per hour are in the hundreds of thousands. Ut oh, it’s killing the server with load averages over 9.00

Edit out your external net

nano /etc/suricata/suricata.yaml
Find “EXTERNAL_NET” and change from $ANY to !$HOME_NET
Find “threshold-file” and uncomment this line
Save and quit

Now I also have a couple nagios monitoring servers around the network that are constantly sending traffic. So I needed to add these servers to the exemption list for suricata.
nano /etc/suricata/threshold.config

suppress gen_id 1, track by_src, ip 192.168.0.253
suppress gen_id 1, sig_id 366, track by_src, ip 192.168.0.252

It’s recommended to reboot the server after making changes.

Fail2ban Ubuntu SSH VSFTP

I like security. The more control I have over a network or system the better I feel. So when I had to push out a couple of secure FTP sites for clients, I had to make sure that they couldn’t be broken into.

First I started with Ubuntu 10.04.3LTS LAMP installation. The rest you can see below:

Update Linux

apt-get update
apt-get upgrade
apt-get install build-essential
apt-get dist-upgrade
reboot

Remove anything unneeded

apt-get autoremove

I installed SSH access to one external-facing system, on a completely separate network, but have edited the allowed hosts to be only my personal public IP. But it’s still a good idea to stop people from trying and filling up the logs. I also installed VSFTP on two external-facing systems – it is these systems that I worry most about.

Install fail2ban

apt-get install fail2ban

Edit the configuration

nano /etc/fail2ban/jail.local

Now I put the following in there:

[DEFAULT]
# “ignoreip” can be an IP address, a CIDR mask or a DNS host
ignoreip = 127.0.0.1 192.168.0.99
bantime = 60
maxretry = 3
backend = polling
# Destination email address used solely for the interpolations in
# jail.{conf,local} configuration files.
destemail = root@localhost
# Default action to take: ban only
action = iptables[name=%(__name__)s, port=%(port)s]
[ssh]
enabled = true
port = ssh
filter = sshd
logpath = /var/log/auth.log
maxretry = 5
[vsftpd]
enabled = false
port = ftp,ftp-data,ftps,ftps-data
filter = vsftpd
logpath = /var/log/vsftpd.log
maxretry = 5

Restart the Fail2ban service

/etc/init.d/fail2ban restart

I checked to see if SSH would be “banned” by trying to connect from another system several times to the fail2ban system (see actions in BOLD):
tail -f /var/log/fail2ban.log

2011-08-24 07:40:29,300 fail2ban.jail : INFO Jail ‘ssh’ uses poller
2011-08-24 07:40:29,330 fail2ban.filter : INFO Added logfile = /var/log/auth.log
2011-08-24 07:40:29,332 fail2ban.filter : INFO Set maxRetry = 5
2011-08-24 07:40:29,336 fail2ban.filter : INFO Set findtime = 600
2011-08-24 07:40:29,337 fail2ban.actions: INFO Set banTime = 60
2011-08-24 07:40:29,481 fail2ban.jail : INFO Jail ‘ssh’ started
2011-08-24 07:40:39,561 fail2ban.actions: WARNING [ssh] Ban 192.168.0.253
2011-08-24 07:41:39,816 fail2ban.actions: WARNING [ssh] Unban 192.168.0.253

You can verify that the ban is active by listing out your iptables
iptables -L

Next I’ll verify that it works on vsftp.
Edit the fail2ban local jail
nano /etc/fail2ban/jail.local
Change the enabled to enabled = true
Restart the fail2ban service
/etc/init.d/fail2ban restart

Then I ran the regex checker
fail2ban-regex /var/log/vsftpd.log /etc/fail2ban/filter.d/vsftpd.conf
Which gave me 0 results.

Edit the failregex configuration
nano /etc/fail2ban/filter.d/vsftpd.conf
I changed from FAIL LOGIN to CONNECT
Save and quit, then restart fail2ban

2011-08-24 08:17:19,564 fail2ban.actions: WARNING [vsftpd] Ban 192.168.0.115
2011-08-24 08:18:19,660 fail2ban.actions: WARNING [vsftpd] Unban 192.168.0.115

***EDIT***
I had a few bots that were trying to get access to directories that didn’t exist.

In my /etc/fail2ban/jail.local

[owncloud]
enabled = true
port = http,https
filter = apache-owncloud
logpath = /var/log/apache2/error.log
maxretry = 3
bantime = 240

In my /etc/fail2ban/filter.d/apache-owncloud.conf

[Definition]
failregex = \[client \] (File does not exist|script not found or unable to stat): [^ ]*/([^ ]*\.asp|[^ ]*\.dll|[^ ]*\.exe|admin|Admin|Ads|ads|apps|archive|awstats|b0ard|bin|blog|board|cgi|clan|cms|community|cube|database|datenbank$

ignoreregex =

Unblock an existing entry
We all know that you can use iptables -L to find the entry and then -D to delete it. Fail2ban doesn’t really like that.

fail2ban-client set JAIL unbanip MYIP
If you forgot your jail name (haha) you can list them all out:
fail2ban-client status

Rancid Ubuntu 10.04

Rancid stands for Really Awesome New Cisco confIg Differ. It’s produced by Shrubbery Networks (http://www.shrubbery.net/rancid/). Basically it’s sole purpose is to make backups of your networking gear. And it can email you of any changes as well. This documentation is a work in progress – I had attempted to setup a rancid server one other time, but ran out of courage shortly after the beginning. And I’m compiling based on a few other internet sources.

Started with a 10.04.3 LTS server with LAMP/Mail(postfix) installed. x86 for those who care. For those who don’t care, it’s still on an x86 system.

I started installation, like all of my other projects, by switching to root:

su

I also created the rancid user with a password:

adduser rancid

Install the Rancid Base:

apt-get install rancid
y

Edit the Rancid Configuration by adding groups:

nano /etc/rancid/rancid.conf
LIST_OF_GROUPS="Group1 Group2 ... Group18"
Save and Quit

Edit the Mail Aliases:

nano /etc/aliases
rancid-Group1: root
rancid-admin-Group1: root
rancid-Group18: root
rancid-admin-Group18: root
Save and Quit

Restart Your Mail Services:

/etc/init.d/postfix restart

Run rancid CVS Groups:

sudo su -c /var/lib/rancid/bin/rancid-cvs -s /bin/bash -l rancid
You should now see a few new directories created in /var/lib/rancid:
/Group1
/Group2

/Group18

We want to edit the configuration files in each of these groups to reflect the devices. We’ll start with /Group1:

cd /var/lib/rancid/Group1
nano router.db
IPADDRESS_OR_HOSTNAME:brand:up_or_down
If you select down, rancid will not actively check this device.
Example:
10.10.0.1:cisco:up
10.15.0.1:cisco:up
10.20.0.20:cisco:up

At one time, whilst setting this up for the first time, I thought that you could only have one login/enable for the entire system. I found that quite “uncool”. Luckily for everyone reading this, I found out that I was incorrect with my assumption. It’s actually quite easy now that I look back on the configuration.

Create A Password File:

The installation of rancid on ubuntu will attempt to create a user called “rancid” with a home directory of /var/lib/rancid, but a login point of /dev/null. But, since we already created the “rancid” user, we must create a cloginrc file to house the passwords for your cisco gear in this user’s home directory. If you run this as root, it’ll be in /root/.clogin.rc
nano /home/rancid/.cloginrc
add method * telnet
add password IPADDRESS_OR_HOSTNAME LOGINPASSWORD ENABLEPASSWORD
add password OTHERIP_OR_HOSTNAME LOGINPASSWORD ENABLEPASSWORD
Save and exit

For SSH:

add autoenable * 1
add method IPADDRESS ssh
add user IPADDRESS USERNAME
add userpassword IPADDRESS PASSWORD
add password IPADDRESS PASSWORD ENABLEPASSWORD

Change permissions of the password file (isn't necessary now that I created the user to begin with):

chmod 640 /var/lib/rancid/.cloginrc
chown rancid /home/rancid/cloginrc

Run the rancid server:

sudo su -c /var/lib/rancid/bin/rancid-run -s /bin/bash -l rancid

View the Log Files:

nano /var/log/rancid/GROUPNAME.DATE.TIME
Where Are The Configuration Files?

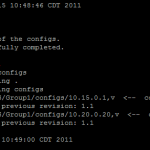
/var/lib/rancid/CVS/GROUPNAME/configs/IP_OR_HOSTNAME,v

Too Much Information:

If you feel like you only want to have the configuration files and not the proc info/mem info etc, just edit the following file:
nano /var/lib/rancid/bin/rancid
Search for "# Mail"
Comment out lines you no longer wish to document
Save and Quit

Add the Web GUI:

apt-get install cvsweb
nano /etc/cvsweb/cvsweb.conf
Find "@CVSrepositories"
Add:
'rancid' => ['Rancid', '/var/lib/rancid/CVS'],
Save and Quit
Restart apache
apache2ctl restart
sudo ~rancid/bin/rancid-run (or, if in as root, rancid-run)
You can now open a web browser to http://IPOFSERVER/cgi-bin/cvsweb

EMail testing
I am having a few issues with email aliases - you're supposed to be able to utilize "rancid-NAMEOFDEVICE: real email" or the like for it to forward. I was getting NDRs as it was trying to send locally. So I temporarily changed the NDR to all send to the email address I wanted to send anyway.

Cron job
I cron this for every 10 minutes - but it takes longer and longer to check all the devices on the network when I keep adding more and more to the configuration.

Sample Configuration (/home/rancid/.cloginrc):

add method 10.15.1.245 telnet
add method 10.15.1.246 telnet
add method 10.11.0.2 ssh
add user 10.11.0.2 rancid
add userpassword 10.5.0.2 P@SSw0rd
add password 10.15.1.246 P@55 3n@bL3
add password 10.15.1.245 P@55 3n@bL3
add password 10.11.0.2 P@SSw0rd 3n@bL3

***EDIT***
Sometimes I'm a little slow when it comes to problems with workarounds - I mean, why fix something when it's only halfway broken?
I forgot that when you edit the /etc/aliases file that you have to run the command newaliases to update the /etc/aliases.db file. Otherwise you'll see "warning: database /etc/aliases.db is older than source file /etc/aliases" in your /var/log/mail.info file. And away we go!

***EDIT 2***
If you put in hostnames instead of IP addresses (preferred method as it makes it easier to find in the list later), it's recommended to add static address aliases instead of relying on DNS.
nano /etc/hosts
IPADDRESSOFDEVICE NAMEOFDEVICE NAMEOFDEVICE.DOMAIN.TLD
Ping the name of the device and verify you have resolution.

Also, I found that rancid HATES capital letters. Recommended that everything be lowercase. ESPECIALLY in your .clogin file!!! I found this out with tail -45 /var/log/rancid/LATESTFILEHERE

And, if you follow my above installation procedure, you will find the main page loads without any icons. I sorted this out by the following:
mkdir /var/www/icons
nano /etc/apache/sites-enabled/000-default
Find Alias /doc/ "/usr/share/doc/"
Add the following below it
Alias /cvsweb/icons/ "/var/www/icons/"
Save and quit
apache2ctl restart
Load the dir.gif, back.gif, and text.gif files of your choosing into the /var/www/icons directory

***EDIT 3***
I set this to cron every hour and email changes - it kept emailing the same router.db retrieving version 1.21 over and over - every hour.
I checked the logs (/var/lib/rancid/logs/NEWESTDATE) and found:

cvs commit: Up-to-date check failed for `configs/IPADDRESS'

Just go to
cd /var/lib/rancid/NAMEOFGROUP/configs
and run
cvs update
Rerun rancid and verify
rancid-run
Ramblings Of An IT Person