Setting Up Virtual Hosts In Apache, and also Editing The Host File On Windows.
For this test, I have an Ubuntu 9.04 Server (LAMP) running Apache2. I also have the testing machine of a Windows 7 Enterprise workstation using Firefox browser, notepad/notepad2 for editing, and putty for ssh connections.
Setting up a virtual host in Apache used to be a long and arduous task – now they’ve made it almost foolproof. Before I start on the how-to, let’s look into why-we-should:
There are a limited number of IPv4 IP addresses
Websites generally do not use up all of the resources of a high-powered server
It costs quite a bit more money to run a single website on a single server (if you’re hosting yourself there’s the power, internet, maintenance, and other problems to add up)
Obviously there is more than one way to go about this, but this is how I did it on my setup:
Log into your Linux server using putty or another SSH application
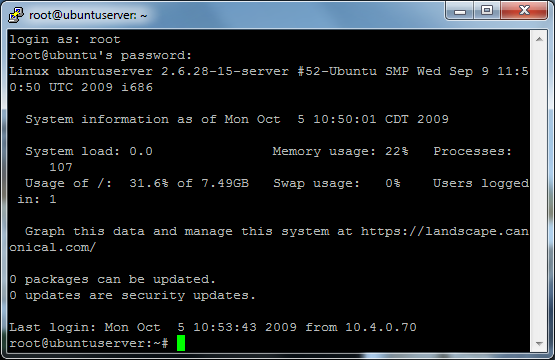
I’m using the root user – if you log as another user you may have to run “sudo command_here” commands. So if one of your commands does not work, try with the prefix sudo.
cd /etc/apache2/sites-available
nano default
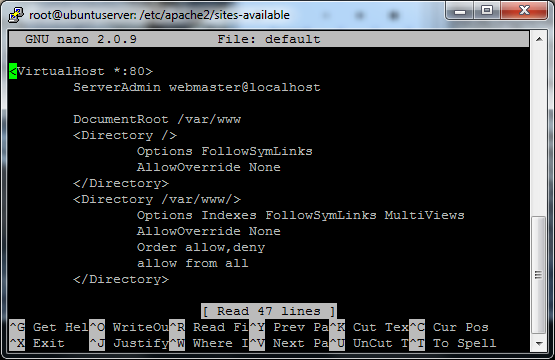
Page down to the end of this file. Everything that is in there should have been installed by default – and we only want to add to the sites and not edit.
Add the following:
NameVirtualHost name_of_your_host

<VirtualHost IP_of_your_webserver>
    DocumentRoot /path/to/your/files
    ServerName domain.tld
    ServerAlias *.domain.tld
</VirtualHost>
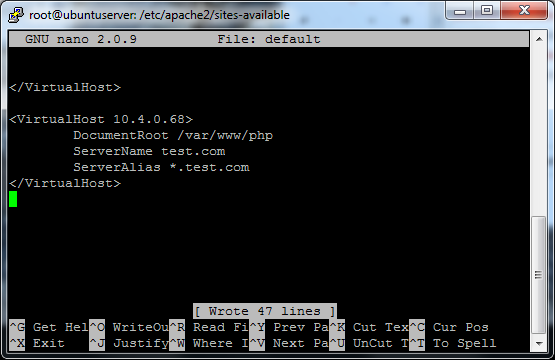
Control X and select save your file. After you save, you’ll have to reset/reload apache so it can re-read the configuration files:
apache2ctl restart
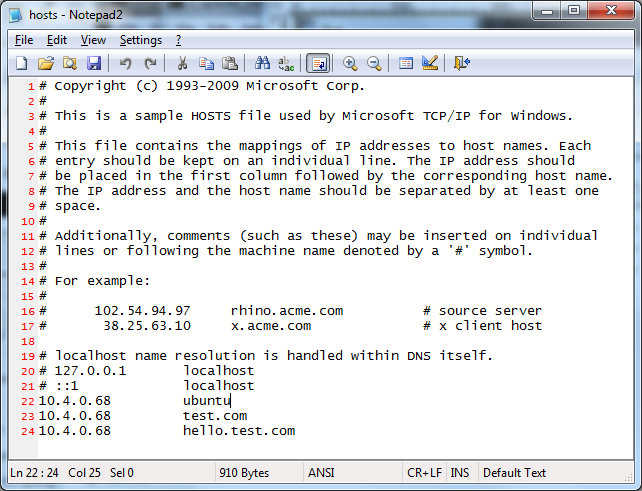
Now to test on your Windows machine we need to edit your hosts file and add the hostname and IP address of your test server.
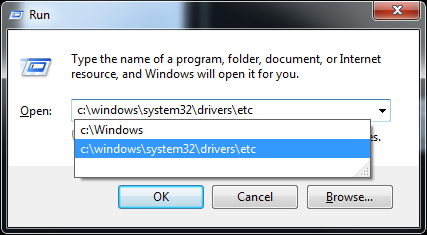
Start > run (or Windows Key + R)
c:\windows\system32\drivers\etc
Edit the hosts file using your favorite text editor (notepad or notepad2 for me)
At the bottom of the file you will need to make the changes:
IP_address DNS_Name
Notice that you can have as many DNS names for each IP address as you want.
Now, open up your favorite browser (chrome or firefox) and navigate to the name you setup. In my case, I go to http://test.com. Since it loaded my test site which was different from my generic http://10.4.0.68 site, I know it’s working.
